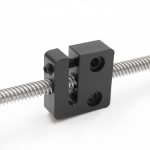
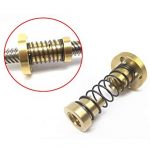
Last post I said I would be going through both Kinematics and Mechanics in this post, but realized how detailed even the basic mechanics are. I will be going over two basic mechanics typically used in 3d printers, Belt and Pulley and Lead Screws. We will be taking a look at how they work, their benefits, and their drawbacks to get a better idea of how they move and where each system would be most beneficial for my printer.
Belt and Pulley
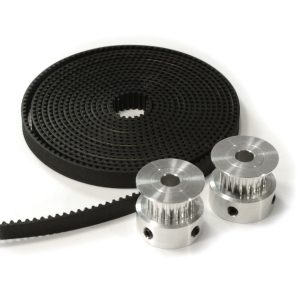
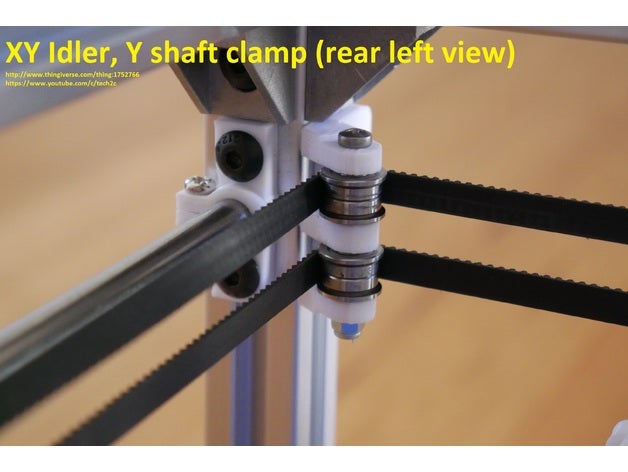
The common belt used for 3d printers is the GT2 Timing Belt. This belt is 6 mm wide with a 2 mm pitch.
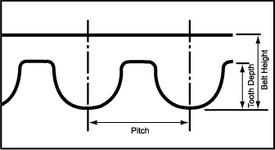
Pitch defines the width between teeth on the belt. A smaller pitch allows for more teeth to be holding on at a time. The GT2 Timing belt also features a round tooth profile, allowing the teeth to smoothly fit into the pulleys and very quickly and easily change direction when needed. The GT2 Timing belt is made specifically for linear motion, so it is the perfect belt for a 3d printer. The GT2 Timing belt is the most common belt you will see for 3d Printers alongside the 20 tooth pulley to drive it.
There is a pretty low ceiling when it comes to the complexity of the mechanics for the GT2 Timing belt. There is really no space to upgrade besides switching to a thicker belt if you need to span greater distances. This may seem like a limitation, but it’s simplicity can be seen as a benefit just as much as a drawback.
Advantages
Distance and Speed
Belts come in a variety of distances, diameters, widths, etc. They are very easy to customize and can be easily bought in closed or open lengths. They can easily transfer motion through all types of distance and angle, they are very flexible and simple to rig up. In addition, they can very quickly move a mass as there is a direct correlation of force across the belt.
Price Point
The hardware is dummy cheap. Its great, if you ever have an issue or want to redo something, you can buy all the hardware and belts you need for like $20. Upgrades or replacements are then easy and quick to make when you can get everything you need on amazon.
Ease Of Use
All you need is a toothed pulley and the belt, everything is very simple to set up, the most important part is making sure your belt is tensioned correctly and has enough contact on your pulleys.
Low Maintenance
You don’t need to grease the belt or maintain it other than some basic tensioning. Making sure the belt is tensioned correctly is the most important to ensuring accuracy. This is easily checked as well as you can just take the belt and pluck it.
Disadvantages
Belt Stretch
This is one of the greatest disadvantages of using a belt driven system. The belts will eventually wear out and lose tension, requiring you to retension your belt. This isn’t too terrible, as I described later, the belts can be relatively easily retensioned. A close eye has to be kept on this to ensure prints as accurate as possible.
Belt Overshoot
Because of the quick moving nature of the belt and pulley there is a certain amount of overshoot to account for based on the mass of the load you are moving and the amount of acceleration applied. So the more mass means a greater period of acceleration to ensure there is as little overshoot as possible. Therefore we must make sure to not over encumber the belt system with a larger load and program a safe amount of deceleration to limit the overshoot as much as possible.
Mechanical Advantage
Because of their simplicity, belt and pulley have very little mechanical advantage. Since we are not using the full benefits of a typical belt and pulley system, our mechanical advantage is based on the radius of the pulley we drive it with. Systems to shift the mechanical advantage would take a decent amount of space and more than likely over-complicate things. Not only this, but pulleys are pretty standard for GT2 timing belts, so its much easier to just get the basic 20 teeth pulley.
Lead Screw
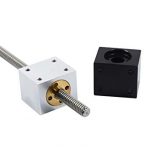
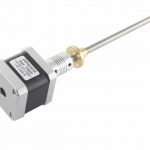
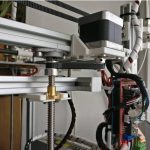
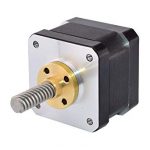
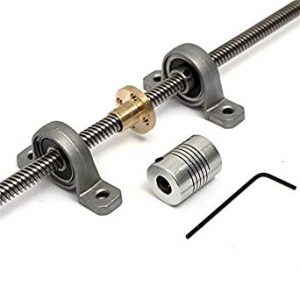
Lead screws are very commonly seen used in 3d printers for the Z kinematics. In a similar fashion to the belt and pulley, the lead screw is also a very simple and easy to use mechanic, but with alternative advantages and disadvantages. The lead screw assembly consists of the screw, the nut, and some sort of mechanism to drive it. Contrary to the straightforward mechanics of the GT2 Timing belt and pulley, the lead screw has a variety of options available to customize and upgrade for your specific need.
Advantages
Price Point
Similar to the belt and pulley, the lead screws are relatively cheap to order as they are simple and easy to reproduce. Although there is more hardware to order and assemble, depending on how many lead screws you are using you can get all the parts needs for under $40.
Customization
Because they have more parts, there is a greater variety of customization for a lead screw assembly. For example, a specific housing can be ordered for the nut for a relatively easier and more square connection point. You can choose to drive the lead screw by a stepper motor attached with a coupler, with a belt and pulley system from a motor separated from the lead screw, or directly embed the lead screw in the stepper motor. Each offers its own benefits and provides a good deal of flexibility to the design.
Mechanical Advantage
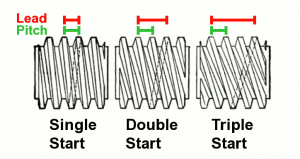
The lead screw offers a greater mechanical advantage than the typical GT2 timing belt alternative. Important details to keep in mind are the lead screw’s start, lead, and pitch. The start is how many separate threads there are on the lead screw, the lead is the distance traversed in a single rotation of the lead screw, and the pitch is the distance between threads. A very common lead screw would be the 8mm lead screw with a single start and a 2mm lead. In this case since it is single start, the lead and pitch are the same. The screw design allows for a single rotation of the screw to traverse 2 mm, and if our stepper motor has 200 steps per revolution, we can already have a precision of .01mm. With microstepping with the stepper motor drivers we can drive this down even further. Since our 8mm lead screw has a circumference of ~25.1mm and our pitch is 2mm, we get a mechanical advantage of 12.5. The mechanical advantages allow us to be more precise and drive heavier loads easier.
Ability To Upgrade
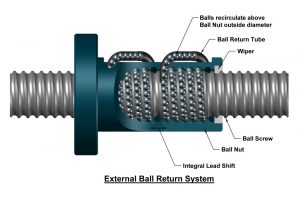
Opposed to the belt and pulley, the lead screw has a more precise (and significantly more expensive) brother, the Ball Screw. These operate the same as lead screws do, but have an important nut that has a cycle of ball bearings inside that allow for extremely smooth and precise motion. These are engineered at a much higher quality and allow for a great deal of accuracy and precision. I won’t be detailing them in this post as they are a bit out of my price range, but they offer a formidable option to upgrade into down the line.
Disadvantages
Fragility
A lead screw depends on being straight as an arrow, so the slightest wobble or imperfection will be obviously visible in the printed part. Ensuring these pieces are properly shipped and well kept is important to the overall quality of the print.
Backlash
One of the more important topics of lead screws is the very common problem of backlash.
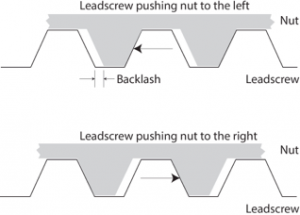
Backlash is the “play” or “slop” generated by extra tolerance spacing between the nut and lead screw. This wobble can generate imperfections in the precision of the 3d printer. Depending on the precision you are shooting for though, this might be easily ignored as it produces imperfections within a certain tolerance range so it doesn’t matter. But to ensure the best possible print, there are solutions.
Options like the lead screw nut block allows for constant pressure to be kept on the screw to ensure a solid contact as well as a convenient place to mount to. Anti-backlash nuts can also be a viable solution as a quick swap with the standard lead screw nuts. These options offer 2 solid options to eliminate all backlash in a 3d printer.
Speed
Because the screw’s pitch is 2mm typically, the linear speed of a lead screw is significantly lower than a belt driven system. This is, however, converted to a greater mechanical advantage, so this is more of a trade-off.
Final Thoughts
Both the Belt and Pulley and Lead Screw offer great advantages and disadvantages. Although there is never a single solution to any mechanical problem, these two lend themselves to be extremely beneficial working in tandem, exploiting their strengths and damping their weaknesses.
Typical Uses
Z Axis
The lead screw is typically used over a belt and pulley system in the Z axis as driving the bed of the 3d printer up and down does not happen nearly as often or quickly as motion in the X or Y, but still relies on very consistent and precise motion. There are also certain aspects such as a lead screw doesn’t necessarily need nearly the same amount of constant force coming from the stepper motor as say a belt and pulley system would have in the same place. Reducing the strain on the motor increases its life and allows for again, more consistent and precise motion.
In the same position as a Z axis lead screw, a belt and pulley design would also fail in a power outage. Should the print be disconnected from power, the weight of the bed would very easily leverage and drop the print bed to its lowest position, ruining any possibility of recovering a print. A lead screw in the same position would generally be able to hold the position and has a higher chance of print recovery.
X-Y Axis
Belt and pulley systems are seen driving the X and Y axes. The biggest factor here is the speed of this system allows for much quicker prints at a very reasonable resolution. Their flexibility allows for the belts to be quickly and easily designed around as well as installed. The boost in speed allows for parts to be printed considerably more quickly than their lead screw counterpart and within relative tolerances.
Now that I have a solid understanding of common mechanics, next post will be detailing a couple different kinematic systems. I will be explaining their method of movement, weighing their advantages and disadvantages, and selecting one that fits my design goals the best.
Sources
- GT2 Timing Belt. RepRap. Retrieved December 16, 2019, from https://reprap.org/wiki/GT2_Timing_Belt
- Hannifin, P. Select the Right Drive Train Technology For 3D Printing: Linear Positioners: Precision Linear Motion Systems. Select the Right Drive Train Technology For 3D Printing | Linear Positioners |Precision Linear Motion Systems. Retrieved December 15, 2019, from http://blog.parker.com/select-the-right-drive-train-technology-for-3d-printing-precision-linear-motion-systems
- Lead Screw: Applications, Advantages, Disadvantages, Types. (2019, March 10). ClubTechnical. Retrieved December 15, 2019, from https://clubtechnical.com/lead-screw
- Mottola, L. Lutherie Information Website. Liutaio Mottola Lutherie Information Website. Retrieved December 17, 2019, from https://www.liutaiomottola.com/Tools/Backlash.htm
- r/3Dprinting – Why do we not see printers with screws instead of belt? reddit. Retrieved December 15, 2019, from https://www.reddit.com/r/3Dprinting/comments/2v4jm9/why_do_we_not_see_printers_with_screws_instead_of/
- Thomson Linear Motion Optmized. Thomson Linear Motion. Retrieved December 16, 2019, from https://www.thomsonlinear.com/en/support/tips/difference-between-screw-pitch-and-lead

