
Last posts I have gone over the updated XY Joiner and the Top Assembly Mounts. This post will detail the X Carriage design.
I have been a bit lazy keeping up with the design of the X Carriage, so here’s the most updated version:


An overview for the responsibilities of the X Carriage:
- Facilitate the ends of the belts
- Slide smoothly on the rails mounted by the XY Joiners
- Provide a faceplate to mount the hotend to
- Provide mounts for other hardware
The main establishing points for determining the dimensions are we need spots for the bushings to mount from the XY Joiner bars and we need a clean faceplate to mount things to. With some measuring and a little bit of spacing for bolts, this is what I had to start:
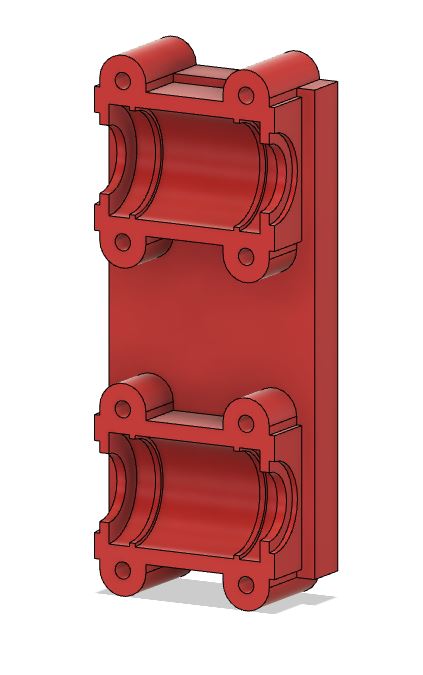
Keeping one side flat will make for not only a nice mounting face, but a much more easy and straight forward print.
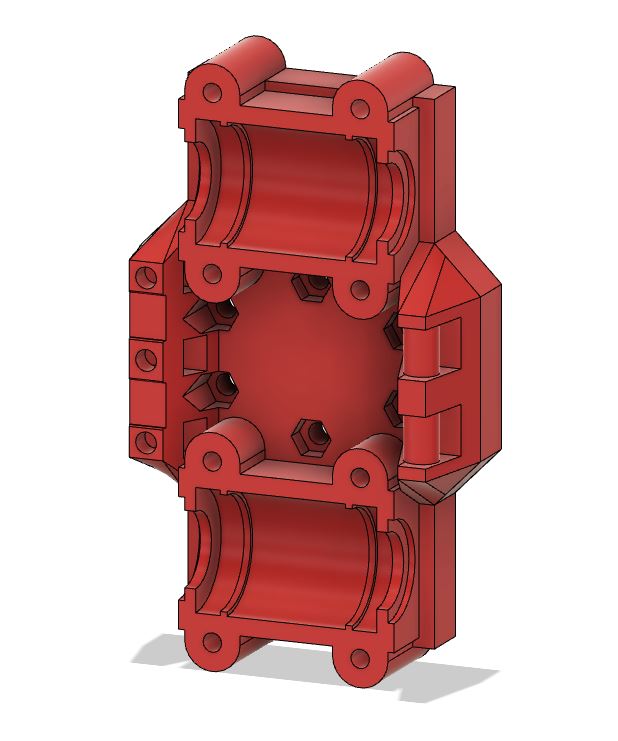
Next was a spot for the GT2 Timing belts to be mounted to. Taking from the Hypercube design by Tech2c, I made one side a round bar to feed the belt around and onto itself to lock the teeth together, keeping it in place with a zip-tie. The other side features an area to clamp the belt to. Since I have spacing for the linear rails, I just compared measurements with the XY Joiner to find exactly where the belts would come off the idler pulleys and that is where I can mount them on my carriage to keep them as flat as possible.


The belt mount can screw directly to the X Carriage and is easily adjusted to change the belt tension.
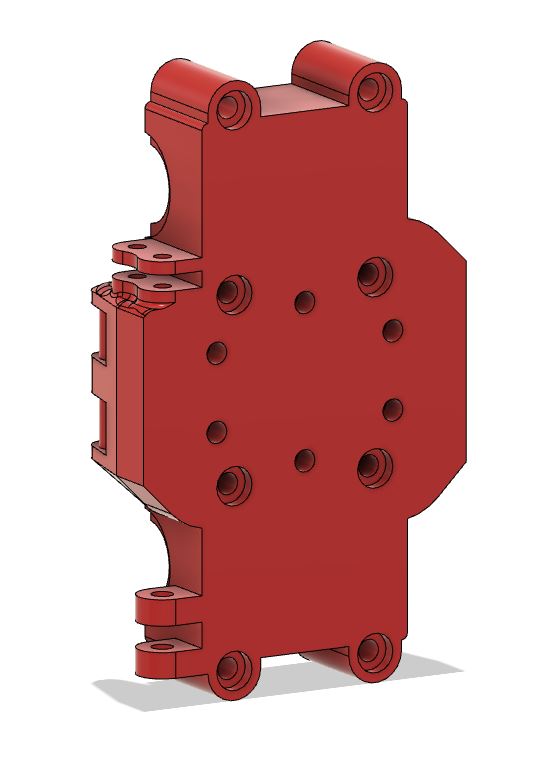
Next is creating mounting holes for hardware to mount to the face plate.
I ended up going with 6 screws in this hexagon shape. It feels like overkill and I want to go back and redesign this in the future because it complicated things for the mount for the hotend of the printer. It could be more simple and I look forward to making it that way, but until then, this will work fine. I recessed the holes for the nuts and tested these tolerances to ensure a nice and tight press fit. Since things are pretty crowded in there, having these press fit in make it super easy to tighten things and let me use my current hardware instead of having to order extra long screws so they can reach to an area I can fit a pair of pliers or something.


Next I trimmed down some of the extra spaces around the edges and put a little hardware mount for the inductive sensor. With another little printed part, I can just slot in a bolt and nut and firmly attach the M12 threaded inductive sensor to the carriage with a little bit of wiggle room to shift around. I can always print another sized arm if this one happens to not work.


Next I put another little mount at the top right for the X Endstop. In my updated XY Joiner post I detail how I created a little spot for the X Endstop switch to clip into place. This does require, however, an arm from the X Carriage to reach out and poke it. I got some rough measurements from an assembled view of the parts of the printer and did I little trial and error to get positioning for the arm correct, but ended up with something that would reach out and poke the switch. This of course can be reprinted should I find it needs to be resized when I put everything together. I also put some extra teeth in on that clamp that fit into the grooves of the belt clamp so it has a little extra tooth to hold onto the belt.
Lastly I inset the screw holes for the bushing mounts so they wouldn’t interfere with any hardware that needs to be mounted to the front.
And with that, the very important X Carriage is complete! It’s a really important piece that I will definitely be making modifications to in the future. I’m sure I will redesign this many times to come.
Next posts I need to go over are the E3d mount that attaches to the faceplate of the carriage and go over my process for creating some snap-clip hardware for the XY Joiner microswitch endstop.